Filezilla Tutorial
FTP stands for File Transmission Protocol. Therefore it is not a specific program, but a specification of a specific way to transfer files.
The programs used to transferfiles using FTP are called 'FTP clients'. There are many of them, for all platforms. Some are commercial, some are free, some are easier to use than others…
We are going to use the well known FTP client Filezilla. It is free and it exists for Windows, Linux and OSX. Anyway the basic configuration options are similar in all clients - feel free to use whichever you prefer.
In all cases you will have to install the client and then configure it (adding your seedbox as a remote server) first. Obviously you only need to do this once.
Filezilla installation
Start by downloading and executing the setup file from the link above.
All default setup options are fine, so nothing to explain there. Accept the license (it's GPL, to sum it up as an user you can do anything you want), choose whether you want to install Filezilla for only you or all the users in the PC, change installation path if you don't like the default one, and that's pretty much it.
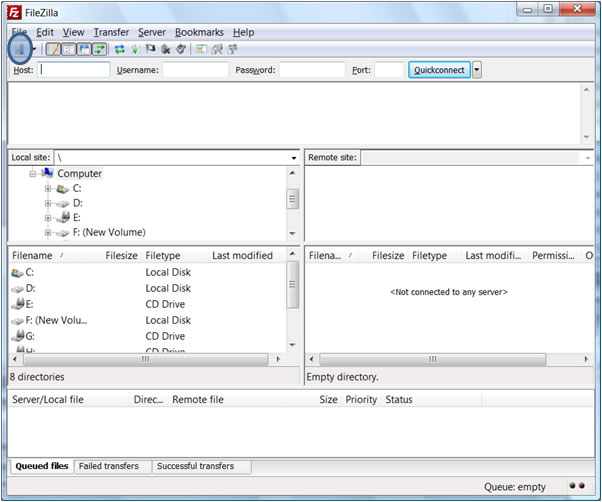
The first time you run FileZilla it looks like this:
On the left there is your computer, and on the right there is nothing yet. Press the highlighted button (site manager) so we can tell Filezilla about the Xirvik seeedbox.
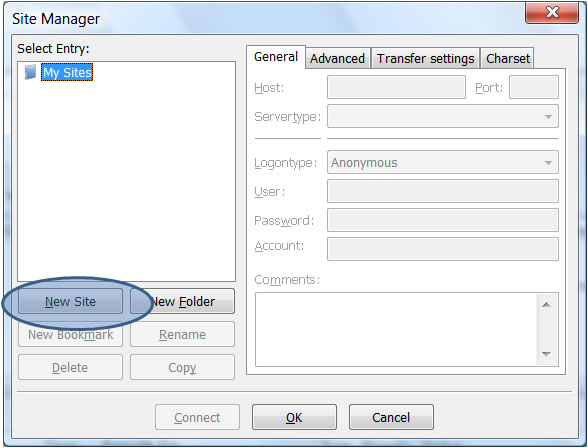
Now click on new site, to add the seedbox to Filezilla's server list.
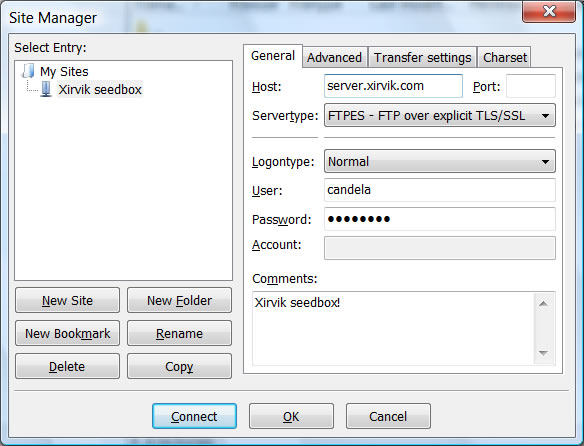
The site configuration screen looks like this:
Note that we called the service (on the left) “Xirvik seedbox”. In the general tab, we used the data from the welcome email: The server name, the user, and the password, which is not shown there.
Leave the port empty, as we use the standard FTP port (which is 21).
For server type, use FTPES, or if you are using a different FTP client, whatever option is needed to enable TLS/SSL - this is for encryption. You can connect without encryption, but we strongly recommend that you use it if it's available. All the options in the other tabs (Advanced, Transfer settings and Charset) are OK with their default values.
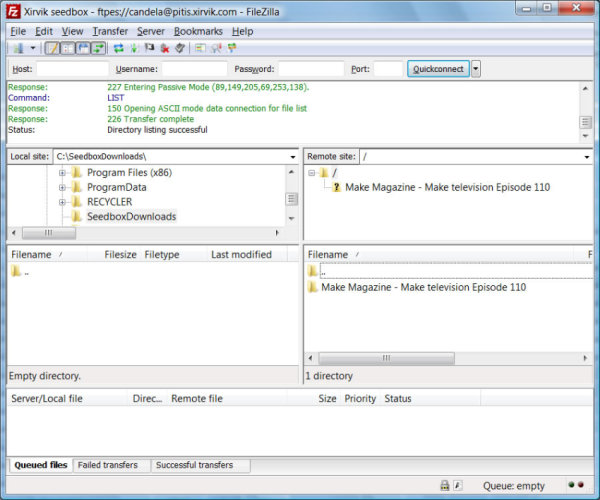
Click Connect are you will finally see your server in the file window. Remember, the left part of the screen shows your computer and the right part shows the contents of your seedbox account:
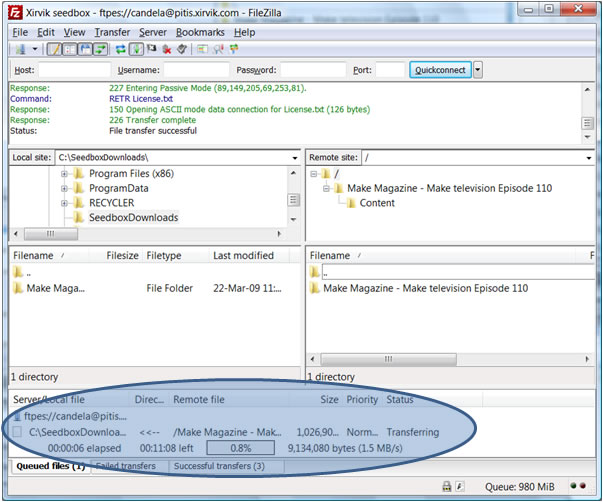
Note that we created a folder called SeedboxDownloads, and that we selected it in the left panel. On the right you can see the Make magazine episode we had downloaded earlier.
Finally, to transfer the files we just drag and drog the folder in the server to the folder in the PC. The transfer starts inmediately, and we can see the progress:
You can see the speed and remaining time.
This is all there is to it. Remember that the server setup part you did before was a one time thing. The next time you start Filezilla, your Xirvik seedbox is listed in the dropdown list by the server manager button:
Xirvik

