Shared Seedbox
Starter's Overview and Guide
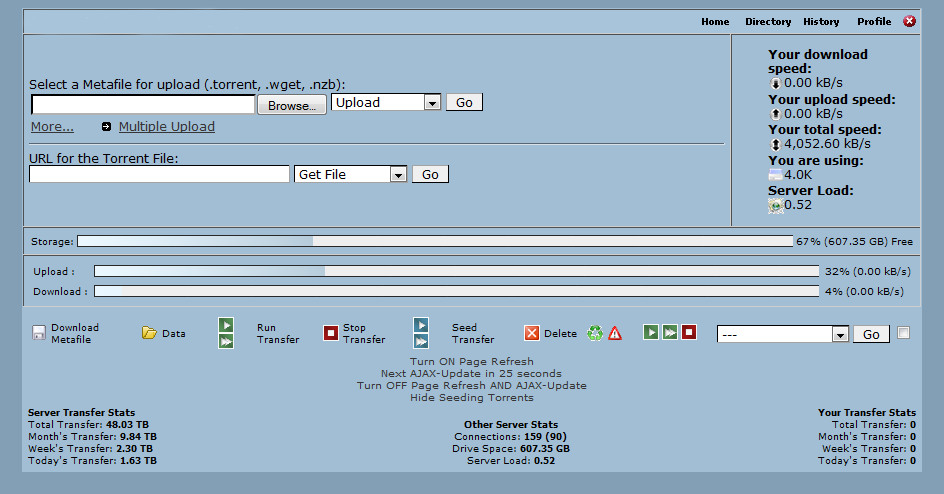
Your shared seedbox comes equipped with Torrentflux-b4rt.
Arguably the most fully featured BitTorrent WebUI (Web User Interface) in existence.
Your seedbox is capable of breakneck speeds of upto 100Mbit/s per second.
It even comes with its own HTTP proxy server, to keep you anonymous and protected.
Those of you new to seedboxes or even just new to the Torrentflux-b4rt client, could potentially run into some trouble first getting started.
We've simplified things quite a bit for you in this tutorial.
Let's begin..
Using your account information, emailed to you at the beginning of your subscription, let's go to your seedbox page.
In your browser URL/Link Bar input your server name “seedbox.xirvik.com” for example.
You will then be prompted to log in.
This information is also provided in your email.
Not much going on, yet, so let's start up our first torrent and put a bit of load on this server!
- Seedbox, check.
- Lightning fast throughput, check.
- Desire for the greatest content the web has to offer, check.
- Seems we're already halfway there, but we're missing one key element.
- A Torrent file!
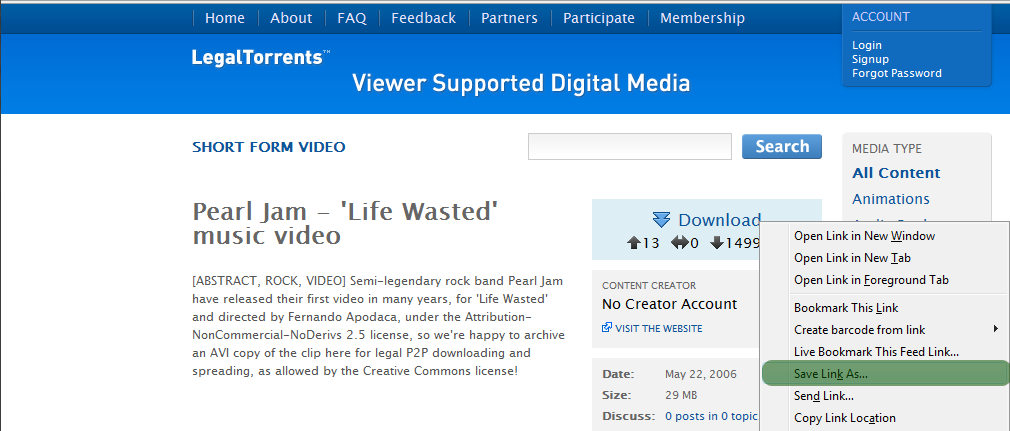
Open up a new browser, or tab, and navigate to a trackers website. In this example we'll use LegalTorrents.com.
Find a torrent that you wish to download, right click the Download link and select Save Link As.. or Save Target As.
You can save it anywhere you'd like, but your desktop will do just fine.
Now let's start downloading that torrent!
Head back to your seedbox's page.
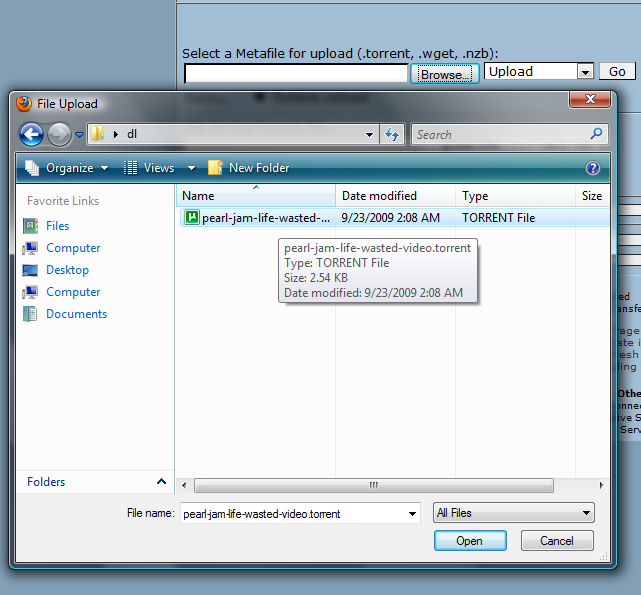
Under Select a Metafile for upload select Browse… and find that torrent we previously downloaded.
You can also add more slots to add files quickly by selecting More..(highlighted in yellow) or hit Multiple Upload to go to a new page with many upload slots.
You may also choose whether you want to just Upload the file, or Upload and start downloading.
We'll select Upload+Start and then Go to process and initiate the download request!

Great, it started downloading.
As soon as it's finished it will start seeding.
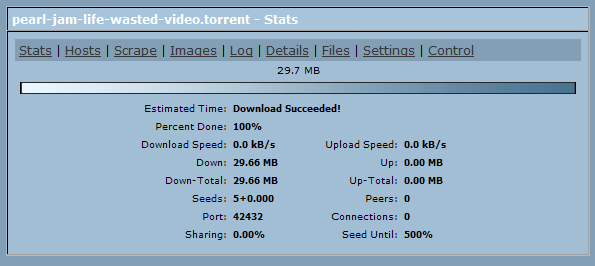
We can click on the new transfer entry to see more information on the transfer.
We can also select Settings to change some settings.
Your seedbox comes pre-configured so theres no need to touch anything here.
You may like to change the client to either Transmission or Tornado, if you're having issues with one or the other.
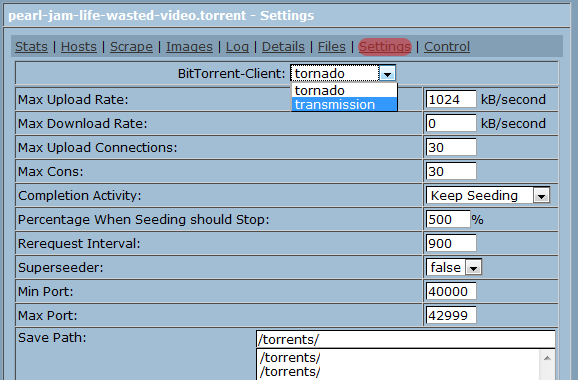
Once done you may hit Save on the bottom right to close this box and save any changed settings.
There are some basic controls which are necessary to learn as well.
Blue: Stop Transfer
Yellow: Delete Torrent (Must stop the transfer first)

Green: Start All Transfers
Red: Resume All Transfers
Purple: Stop All Transfers
Apart from the above, there are also a few more multiple action's you can perform.
Pink: Select as many of these checkmarks to perform actions simultaneously on all corresponding transfers.
Orange: Select this checkmark to select all transfers.
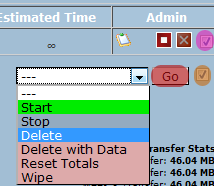
Click on the dropdown list to choose which action to perform on the checked transfers.
Then hit Go to do it!
Pressing the Directory Button on the top of the page will let you access your stored files.

Here you can Download, Rename, and Delete your files/folders.
You can even Make Them Into Torrents, which you can later upload to trackers!
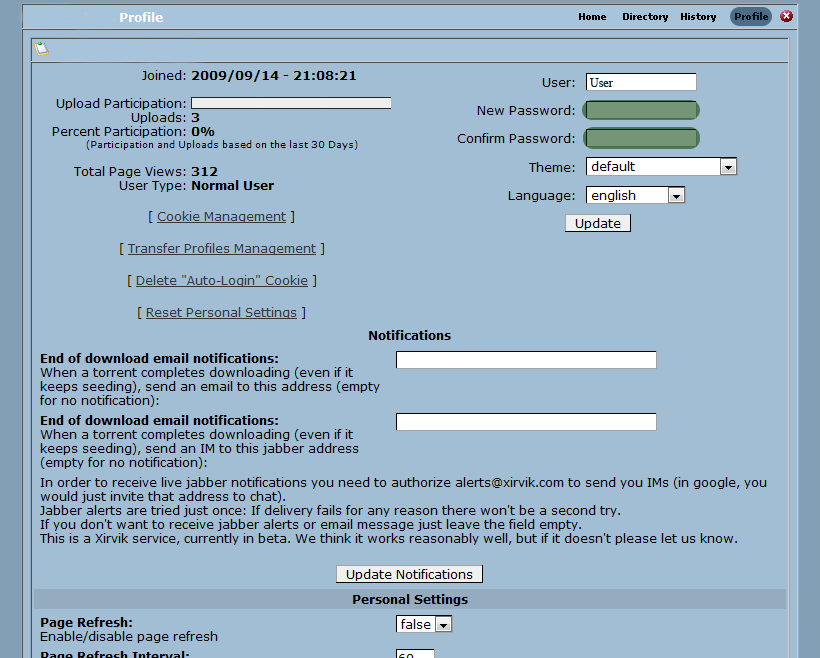
You can also hit profile up top to change some generally unimportant options.
You may change your password here (make sure you fill in both fields).
Or change your Theme to something more appealing.
Despite assuming you speak well enough english to read this tutorial, you can also change the language here.
Afterwards hit Update to save these settings.
That sums it up!
Consider yourself fully able to use torrentflux-b4rt now!
What are you waiting for? Put that seedbox to use.

