OpenVPN Tutorial
Setting up a VPN (Virtual Private Network) tunnel/connection from your computer to your Xirvik Seedbox server is a rather basic procedure.
It is also believed to be the best method available to maintain online anonymity.
If setup correctly the VPN will route all traffic through your seedbox, making you invisible to the outside world.
To ensure proper setup, and avoid problems, the process has been outlined below.
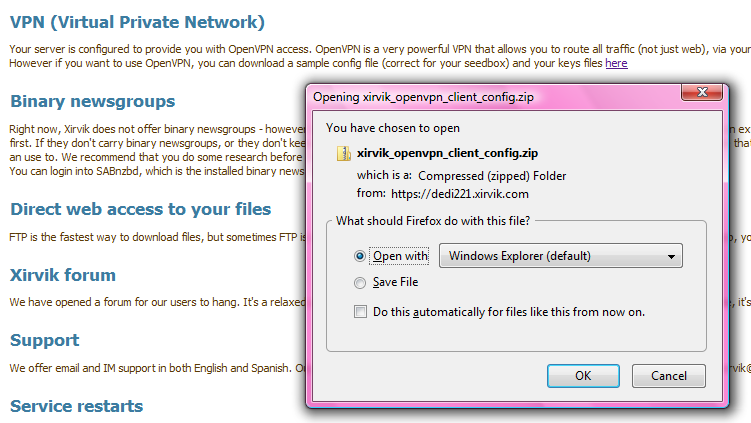
Before we begin we must get our server's configuration files.
These are available from your main server page under the VPN section.
Save the zip file anywhere, preferrably your desktop.
We'll get back to it later.
Table of Contents
- Setup on Windows (Section 1)
- Setup on Linux (Section 2)
- Setup on Mac OS X (Section 3)
Setting Up VPN On Windows
(Section 1) (Table of Contents)
Let's start by downloading an installer which contains the necessary components to get the VPN running.
We will be using the excellent, free, open-source, secure tunneling daemon, known as OpenVPN.
The installation file can be downloaded from this page.
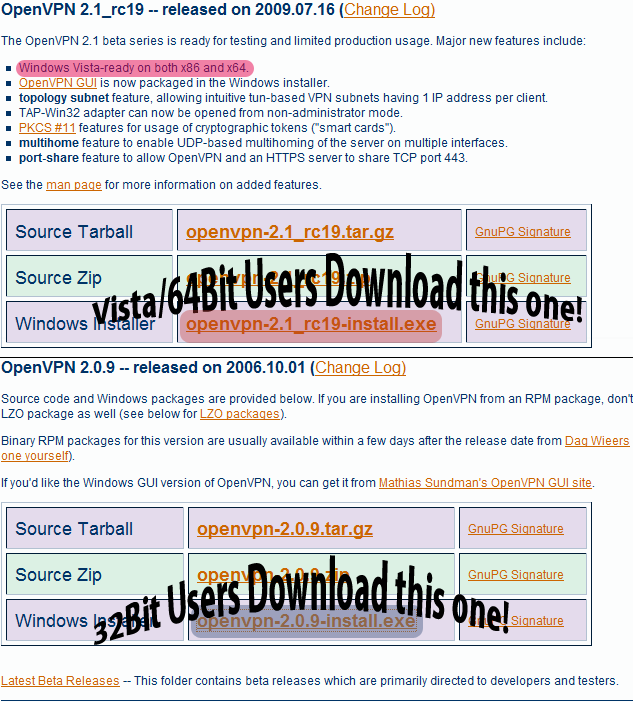
You have 2 options available for download. It depends on your Operating System and processor type (64bit/x64 or 32bit/x86).
If you have 32bit Windows XP or prior it is recommended to get the stable release (currently 2.09).
If you have Windows Vista, 7 or a 64bit processor, the beta series is the recommended choice.
If one doesn't work out for you, then try the other one.
Download the setup file.
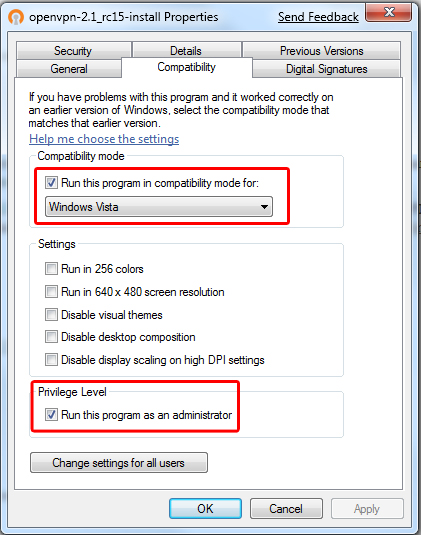
If you have Vista or 7, prior to installation you must right click the setup file and select Properties.
Go the Compatibility tab.
Vista users: Select Run this program as an administrator
7 Users: Select Run this program as an administrator and select the Run this program in compatibility mode for checkmark and choose Windows Vista.
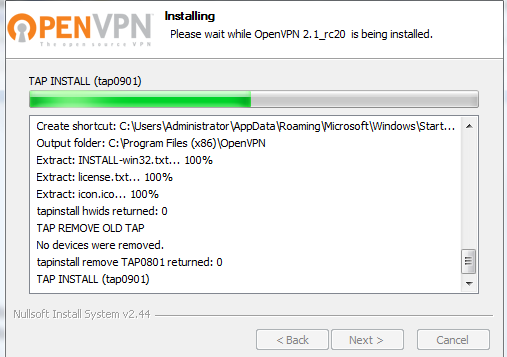
Now hit OK and begin the installation process by double clicking the file.
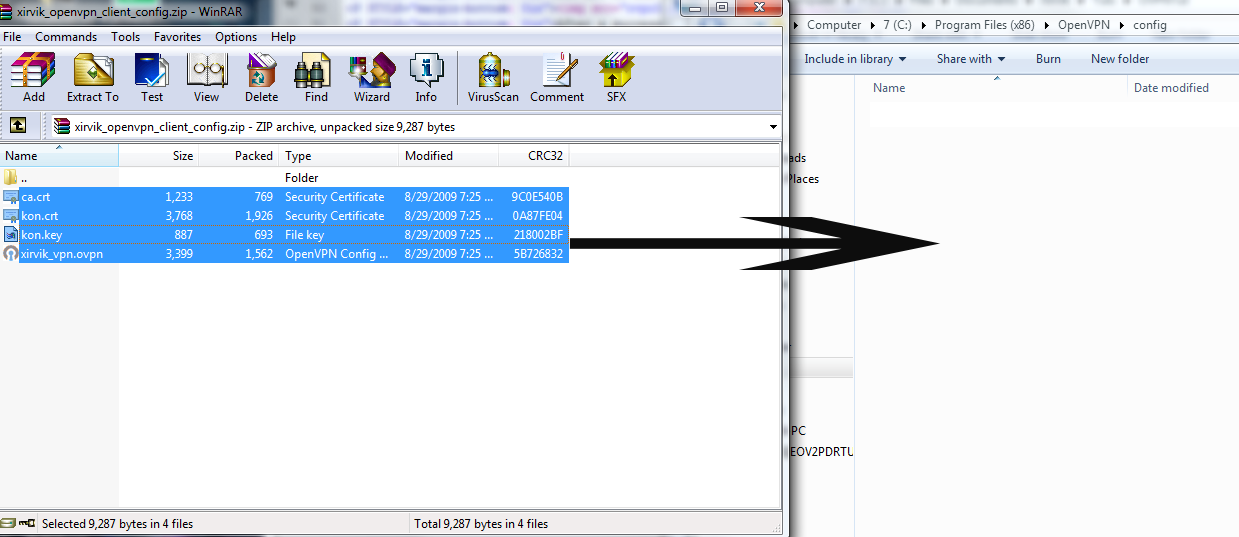
After a successful installation, we can go back to our keyfiles we downloaded earlier and extract them using WinZip/WinRar.
Extract them to wherever you installed OpenVPN, in the config folder. Most likely C:\Program Files\OpenVPN\config.
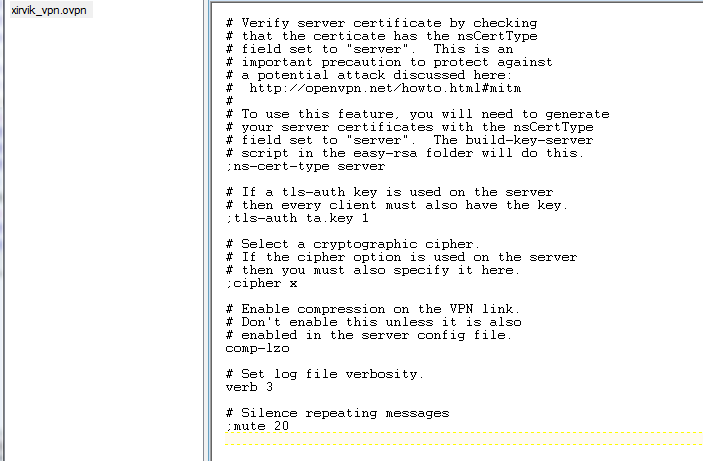
Open the file titled xirvik_vpn.ovpn with notepad or another text editor such as textpad.
See the example below.
At the very end of the document/configuration file enter the following code to route all traffic through the VPN. Don't forget to replace everything in parentheses with the proper information.
redirect-gateway def1 bypass-dhcp
# Any DNS can go here

dhcp-option DNS (Primary DNS)

dhcp-option DNS (Secondary DNS)
Here is an example of the code, with real information.
If you're unsure about your DNS, you may use OpenDNS which is free and very good.
Copy the code below exactly if you'd like to use OpenDNS.
redirect-gateway def1 bypass-dhcp
# Any DNS can go here, i use OpenDNS

dhcp-option DNS 208.67.222.222

dhcp-option DNS 208.67.220.220
Once finished entering the information, save and close your text editor.
Now let's try it out by opening the OpenVPN GUI.
A shortcut should be on your desktop.

Look to the bottom right, and you should see a icon such as the one in the picture below..
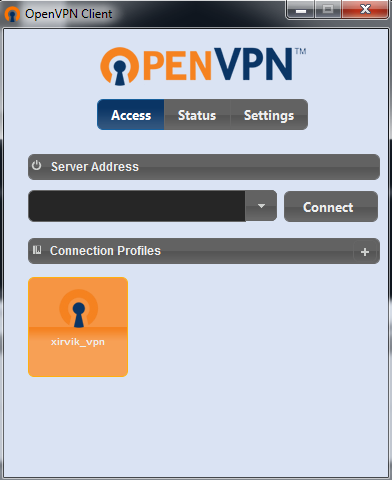
Right click it and select Connect or simply double click the icon.
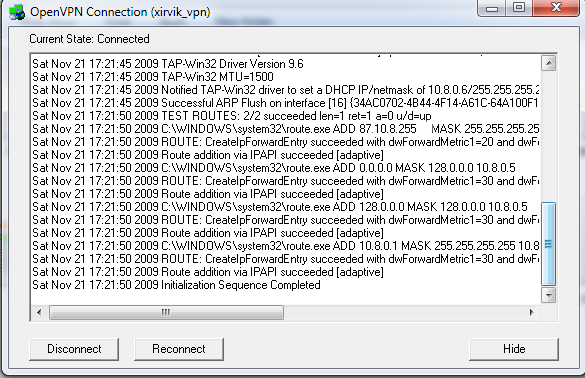
The OpenVPN client will now try to connect to your VPN server.
Once connected the icon in your taskbar will turn green.
To verify the connection, click here to jump to the end of this tutorial and test your connection.
Setting Up VPN on Linux
(Section 2) (Table of Contents)
In this tutorial we will be using the Linux Mint distribution, which is a variant of Ubuntu. Both are Debian-based operating systems.
Regardless of which linux distribution you have, installation should be similar.
First let's open up our Terminal from the menu.
Enter in the following code:
sudo apt-get install openvpn
When asked if you'd like to continue type Y then press Enter.
This will automatically download and install the necessary files from the proper repository.
If for whatever reason this method isn't working for you, refer here to manually install.
Once completed navigate to the folder you placed the certficate files we downloaded in the first step.
If you placed them on your Desktop it would be something like this:
cd /home/Desktop
Now we're going to Unzip the key files with downloaded in the first step to the proper directory.
To do this insert the following code and then press enter.
sudo unzip xirvik_openvpn* -d /etc/openvpn
If done correctly all the files will inflate into /etc/openvpn.
Now we need to edit one of the files, xirvik_vpn.ovpn.
Type the following code into the terminal.
sudo gedit /etc/openvpn/xirvik_vpn.ovpn
The text editor should open up.
First we need to make sure the configuration file is properly reaching the key and authentication files.
Find the portion of the code that looks like the picture below, and change the ca, cert, and key locations to /etc/openvpn/.
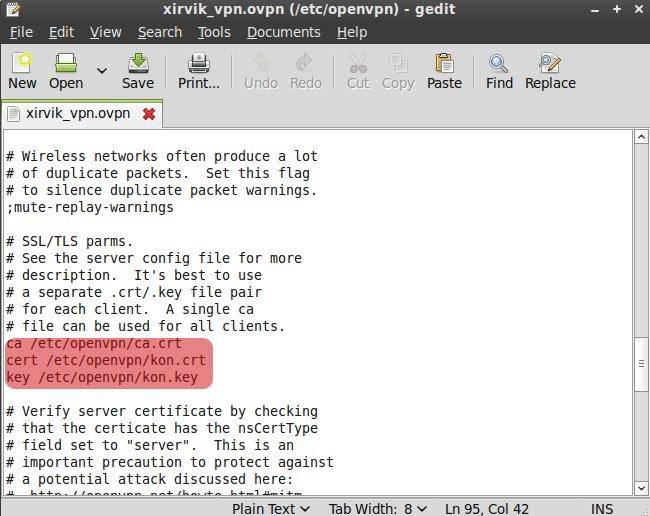
Use the picture above as an example.
At the very end of the document/configuration file enter the following code to route all traffic through the VPN.
Don't forget to replace everything in parentheses with the proper information.
redirect-gateway def1 bypass-dhcp
# Any DNS can go here

dhcp-option DNS (Primary DNS)

dhcp-option DNS (Secondary DNS)
Here is an example of the code, with real information.
If you're unsure about your DNS, you may use OpenDNS which is free and very good.
Copy the code below exactly if you'd like to use OpenDNS.
redirect-gateway def1 bypass-dhcp
# Any DNS can go here, i use OpenDNS

dhcp-option DNS 208.67.222.222

dhcp-option DNS 208.67.220.220
Once finished entering the information, save and close your text editor.
Now let's give it a shot.
In your terminal enter the following code.
sudo openvpn –config /etc/openvpn/xirvik_vpn.ovpn
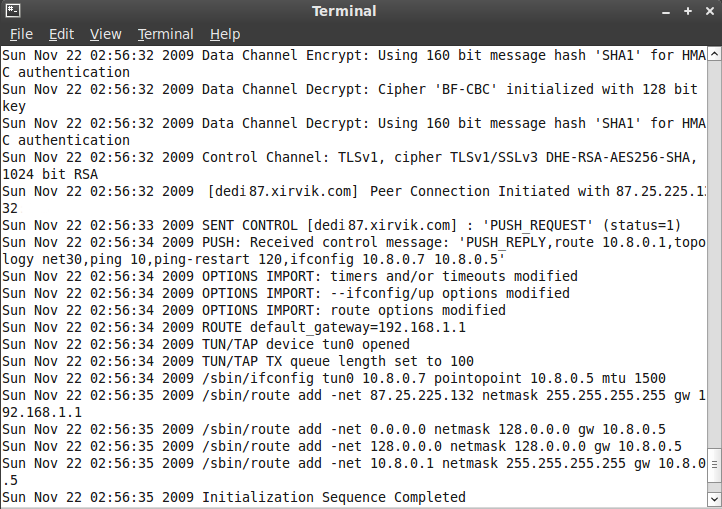
Hit Enter, and it should start connecting.
Thats what a proper connection should look like once completed.
To verify the connection, click here to jump to the end of this tutorial and test your connection.
To more quickly start the connection you can create an easy shell program.
In terminal type the following code:
echo openvpn –config /etc/openvpn/xirvik_vpn.ovpn > vpn.sh
This will create a new file called vpn.sh. When you want to connect open your terminal and type the following code to connect:
sudo bash vpn.sh
To close the connection hit Ctrl + C or close the terminal box.
Setting Up VPN on Mac OS X
(Section 3) (Table of Contents)
If you have Mac OS X 10.4 or later, it is possible to get OpenVPN working. Thanks to TunnelBlick.
Download the latest version of TunnelBlick from here.
Installation is the same as other Mac applications, and OpenVPN is included with the TunnelBlick GUI.
The configuration files have to go into /Library/openvpn.
For further information and support see here.
Testing The Connection
To verify that you are successfully connected..
First refresh your page.
Check the sign below, if your IP has changed and your ISP is being read as something like OVH Systems, then mission complete!
You have successfully setup the VPN correctly and are routing all your traffic through your seedbox server!

Don't forget to refresh this page in your browser, and then check again.
That concludes the tutorial.
You should now have no problems connecting through your VPN tunnel.
Enjoy being anonymous!
