CuteFTP Tutorial
CuteFTP is an FTP (File Transfer Protocol) client, used for transferring files either to or from a server.
FTP is most beneficial with large numbers of files or folders, but you'll soon want to use it every chance you get.
It's simple and quick, no harder than dragging and dropping files like we're all used to.
What makes CuteFTP so great?
The ease of use, speed, and professional yet intuitive interface make CuteFTP one of the very best FTP solutions.
That's not all there is to CuteFTP though.
Don't let the name fool you, it's got quite an arsenal of advanced features including several types of encryption, queue saving, scheduled transfers, and much more.
We will cover the basics of getting connected to your Xirvik seedbox, and a bit extra to get you off to a good start.
First, make sure get CuteFTP if you don't have it already.
Support the developers and buy it from here.
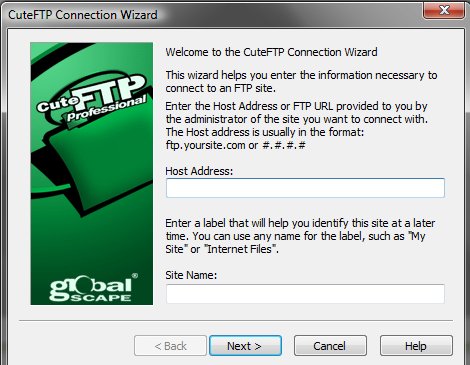
When you first open up CuteFTP, you'll see this dialog box.
(Note: If this isn't your first time you can access the connection wizard by using Ctrl+J or File > Connect > Connection Wizard)
Go ahead and fill Host address with the URL you use to access your main seedbox page on Xirvik.
The site name will fill auto-fill with the host address you specify, feel free to change it to anything you'd like.
Hit Next.
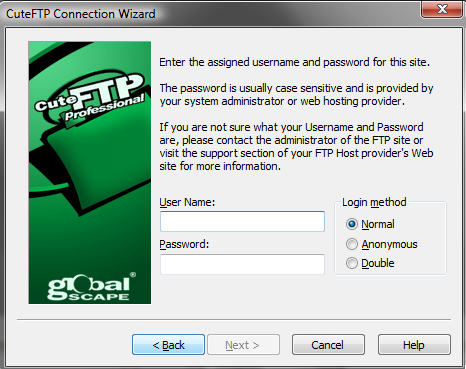
Enter in your usual seedbox Username and Password into the corresponding fields.
Hit Next.
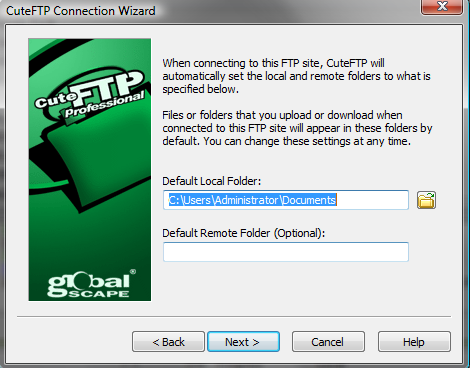
This next section isn't important, just choose where you'd like the default local folder to be.
All this means is that when you connect to the server CuteFTP will automatically set the local directory to whatever you specify.
If unsure, choose C:\.
Hit Next & then Finish.
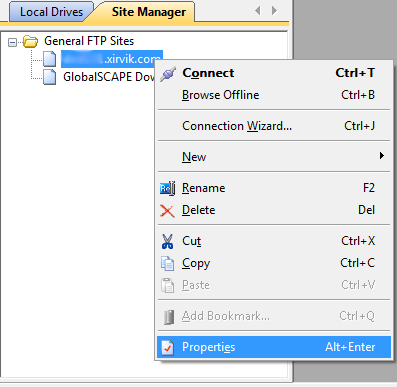
You'll now see your newly configured FTP server in the Site Manager to the left.
Let's go ahead and right click on it and navigate to Properties.
Here you can change everything about the way CuteFTP connects to the server.
All we need to do now is switch to Type and select FTP with TLS/SSL (Auth TLS - Explicit) under Protocol Type.
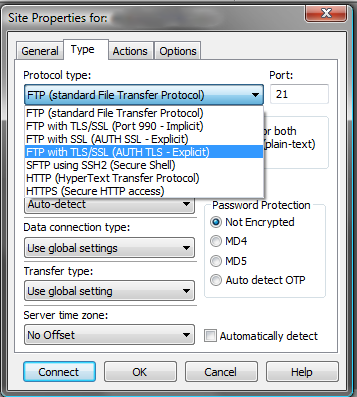
Now hit Connect so we can try it out!
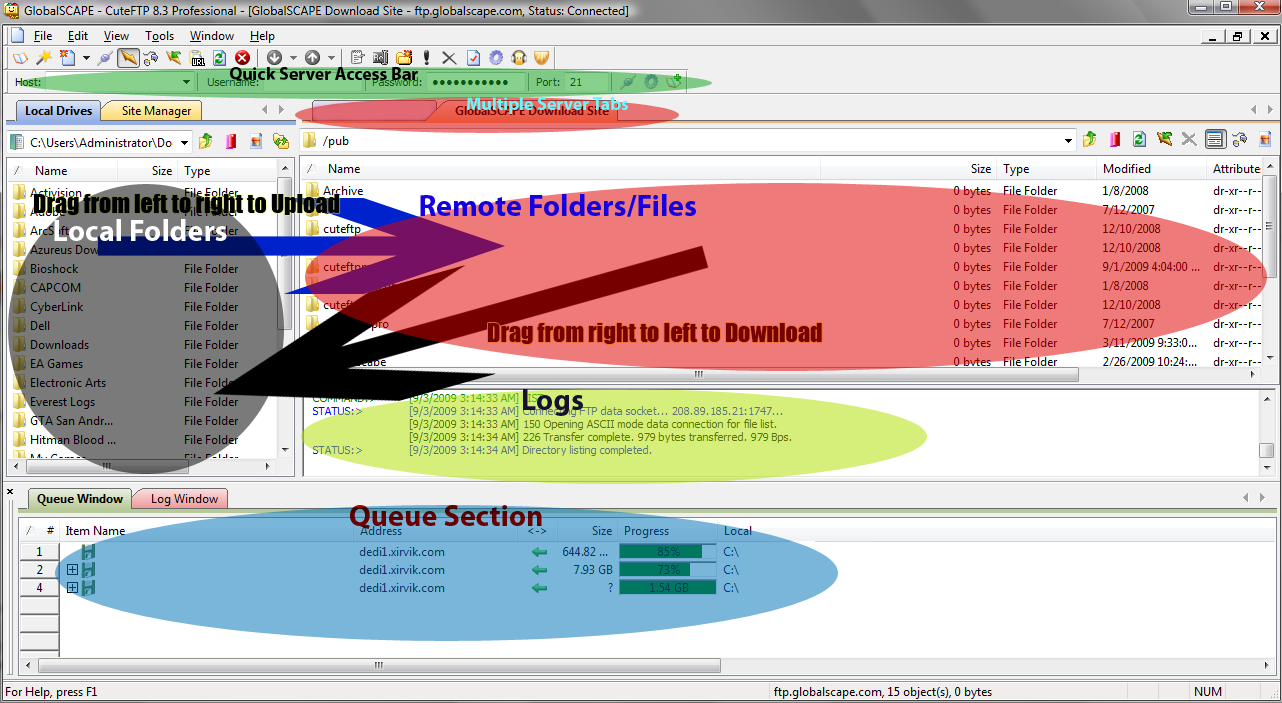
So now that you are connected, here's an overview of the main CuteFTP window.
You can use the quick server bar to enter in server information quickly, and connect.
You can drag from the left panel (Local Folders) to the right panel (Remote Folders) to upload files and folders.
Dragging from the Remote folders to the Local folders will download the files and folders.
Alternately you can right click click files and hit Download.
Once you begin downloading/uploading something it will be visible in the Queue section.
Here you can stop, start, and delete the transfer by right clicking on it.
Below is an example of what you will see if you right click a queued transfer.
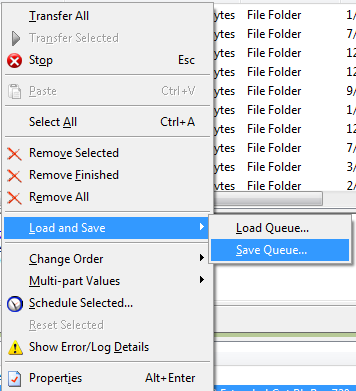
Everything is basic here.
You can also load/save your queues, and change the order in which something will download here.
Also you can remove queues that are either finished or still going from this context menu.
Also if you ever want to close CuteFTP but don't want your downloads to stop, go ahead.
They will continue downloading in the Transfer Engine. You can see it in the bottom right of your screen next to your clock.
When CuteFTP is closed, double-click it to see your Transfer's in action!
That just about sums it up!
I hope you enjoyed this tutorial, and now have a better understanding of what CuteFTP is all about!
Thanks for choosing Xirvik.
